
Worthington Compressor Reconstruction II
The next major task that needed to be done after setting the crankshaft frames and crankshaft into position was to align and level them to each other, and in turn to the cylinder bed plates during the spring of 2003. To accomplish this, each of the pieces on the foundation rested on steel shims, or wedges. These were adjusted as needed to make the pieces level, as well as shifting the pieces horizontally on the foundation.
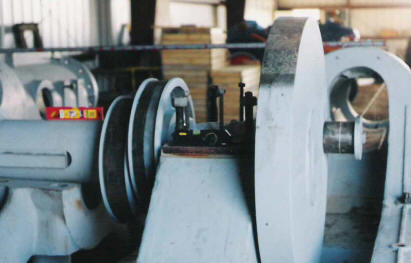
| These pictures illustrate some of the techniques used to check the alignment of the base pieces. In the top picture you will note the levels placed on both the frame and on the crankshaft itself. If you look closely you can also see that the crankpin has been positioned at the centerline of the crosshead frames, with a string attached to it and out toward the back end of the engine. By centering this string on the crankpin and the crosshead guides, it established the centerline for the crossheads, pistons, and piston rods. With this string extended to the rear end of the engine, it could also be used to set the height and alignment of the cylinder frames. |
|
|
|
|
|
|
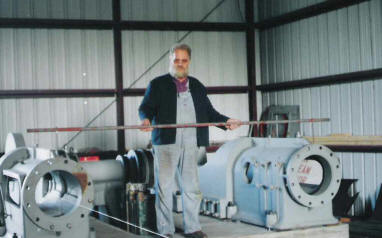
Here you can see another tool that was used for aligning the frames to each other, the tram bar. |
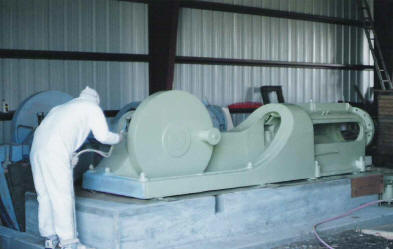
| With the base pieces all properly aligned and leveled, it was finally possible to tighten the nuts on the base bolts to hold the pieces in place. At this time we were ready to paint the frames to protect them from rusting. The green color was chosen because most engines of this period were painted in earth tones such as browns, greens, or other dark colors. It was impossible to tell after the pieces were outside so long what the original color of this particular engine may have been, so our choice of green was simply an educated guess. |
|
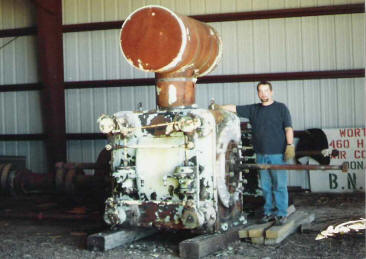 |
At this point, attention was turned to the next large pieces that would be assembled, the steam cylinders. It is easy to see in this picture how the cylinders had suffered during their time of outside storage. The cylinders were both fully disassembled, with the exception of the heads, pistons, and piston rods. All of the valve linkage, valves, valve bonnets, and dashpots were removed for cleaning and reconditioning, and the cylinder jackets were removed for cleaning and painting as well. |
| Here you can clearly see the difference on the low pressure cylinder, after the cylinder jacket and dashpots have been reinstalled. Unfortunately it was not possible to preserve the original "Russia Iron" finish (bare steel with a strong blue tint). So, the jackets on both cylinders were painted a deep blue that simulated the original finish as closely as possible. The bulge on the side of the low pressure cylinder is the steam passage for the exhaust steam from the high pressure cylinder to the receiver above. | 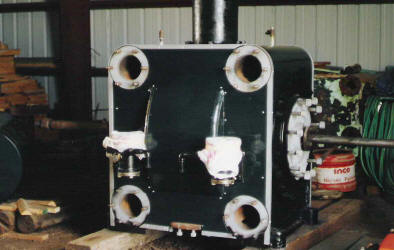 |
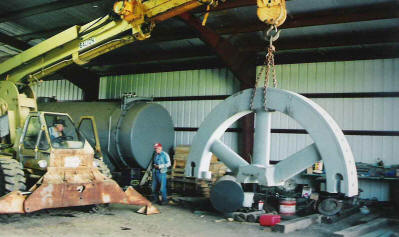 |
Once both cylinders were prepared it was time to set them on the base as well as the other half of the flywheel. Final flywheel assembly was not done earlier so that the crankshaft would be as light as possible while having to perform the engine alignment. The end result of this days work can be seen in the picture below, which brings us approximately to the later part of 2005. |
 |
|
For more of the reconstruction series of the Worthington click here