
Worthington Compressor Reconstruction III
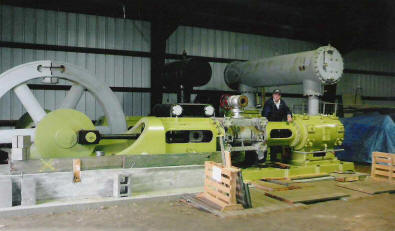
After the steam cylinders were attached to the engine, attention turned to the next batch of pieces to be installed. This included the air cylinders, low pressure steam receiver, air cylinder intercooler, and the connecting rods. The connecting rods were cleaned and installed first, since they could now be attached between the crankshaft and the steam cylinder piston rods. The spacers that go between the steam and air cylinders were also cleaned, painted, and installed. Once these tasks were completed, it was time to install the final batch of large pieces.
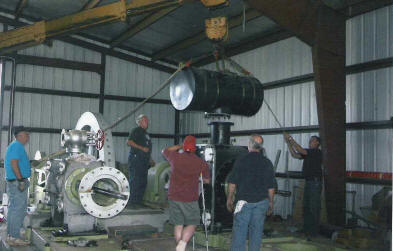
| Here the low pressure steam cylinder receiver is being lowered into place. The purpose of the receiver is to store the exhaust steam from the high pressure cylinder, where it is ready to be put to work in the lower pressure cylinder. The high pressure cylinder exhausts into a pipe beneath the floor, which then travels beneath, and then up and around the side of the low pressure cylinder by a cast in passage. |
|
|
|
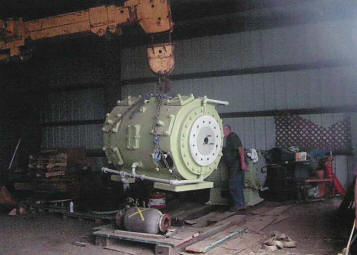
Here the low pressure air cylinder is shown being lifted to be place on the engine. Since the air cylinders are relatively simple and weather tight, the only real attention they needed was cleaning and painting. The cylinder heads were also removed so that the piston rods could be attached to the air cylinder pistons. |
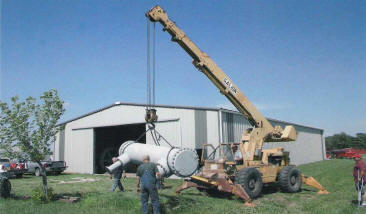
| This large piece is the intercooler which connects the high and low pressure air compressing cylinders. The intercooler is essentially a large tube radiator, with the compressed air passing through a bundle of tubes that are surrounded by cooling water. This serves two purposes - first to help cool the air from the heat generated through compression, and also to help remove water from the air by condensing and separating it. |
|
|
|
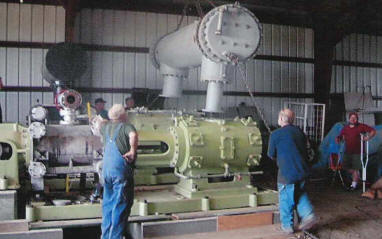
Here the intercooler is being lowered into its final resting place on top of the two air cylinders. All of the careful work and preparation on the foundation design and alignment of the engine paid off at this point since it mated to the air cylinders with no problems. |
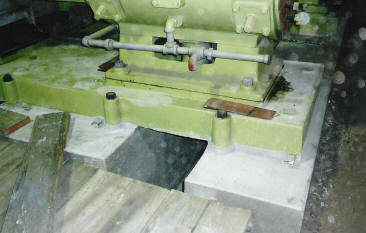
| With all of the pieces now in place and the alignment confirmed, it was now time to move on to the next large task, the grouting of the engine to the foundation. Grout is essentially a special concrete mixture that "glues" the engine to the foundation by filling the gaps between the base pieces and the foundation itself. In this picture you can see some of the boards that were placed around the foundation as forms to contain the grout while it was being placed. |
|
|
|
A local concrete company with experience in machinery grouting was contracted and came to the grounds in 2007. Here you can see the special grout "pump" where the concrete mixture was mixed, and then pumped by hose into the grout openings in the base pieces. |
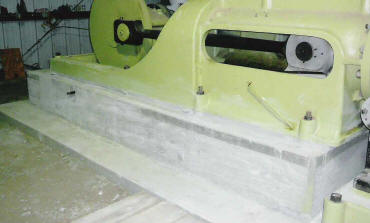
| The result of the grouting work can be seen in these two pictures, after the forms have been removed. You can easily see that the gap that once existed between the frames and the foundation are now completely filled, and the engine is permanently attached. |
|
|
|
For more of the reconstruction series of the Worthington click here